Alrighty, so I have been going through all of the photos that I have taken for my blog over the past 8 months or so (EEK!) and I ran across this fun little craft that introduced Alice to the fun of painting "tootsies". I am sure you have seen these before, but it was so fun, I couldn't resist posting it.
The first thing we did was pick our colors. I had selected traditional Thanksgiving/Fall Harvest colors. Alice added the purple. I think the contrast is nice together. Who would have thought that a two year old could open my eyes to a different design option?!?! Anyway, once our colors were selected, we put some on paper plates. As you skim through various painting blogs, you will notice we paint A LOT on paper plates. Plates do not bleed through like paper does...even the "artist" paper bleeds horribly when a child is finger painting. For the actual turkeys, I did use paper because the amount of paint was controlled.
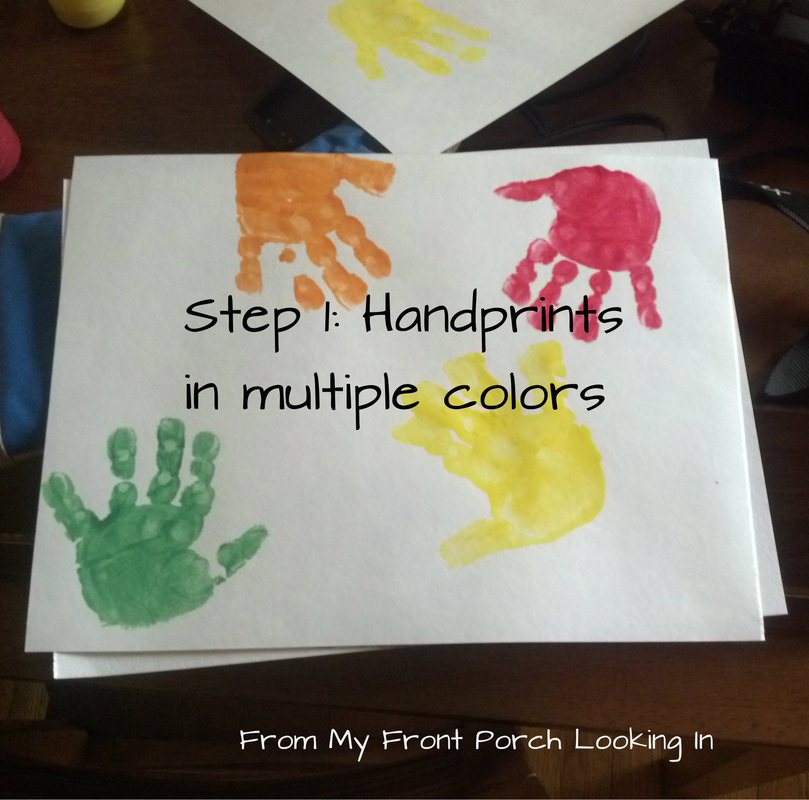
The first step was to paint Alice's hands each of the beautiful colors. Of course, we had to make 4 or 5 different sets for all of the grandparents. Alice really got a kick out of this because it tickled! Every time the brush came into contact with her fingers, she would giggle!
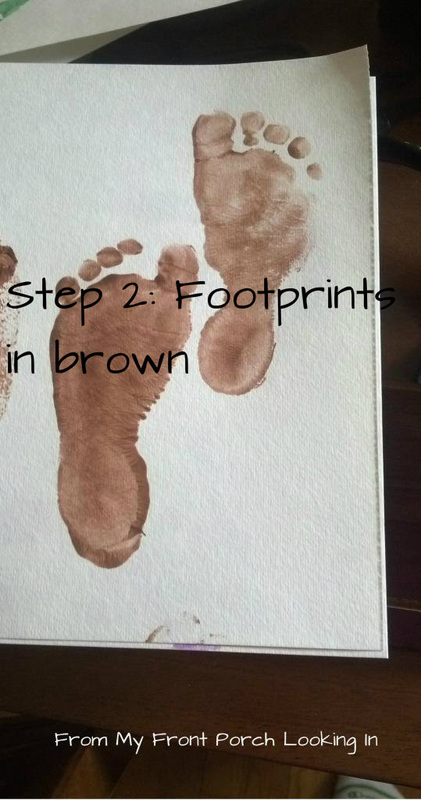
Once all of the hands were done, we took off the socks and got down to the business of painting feet! Well, that really got Alice going! She was laughing so hard my husband had to help me so she didn't get brown paint all over the place. We painted both feet which meant that half of the turkey bodies were lefties and half were righties.
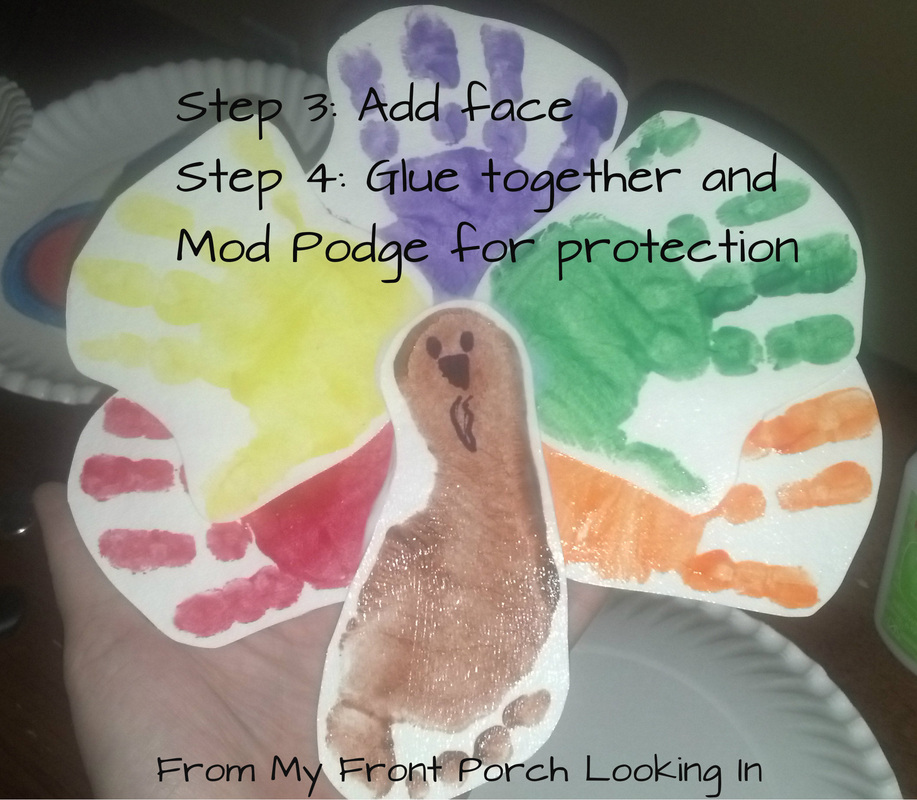
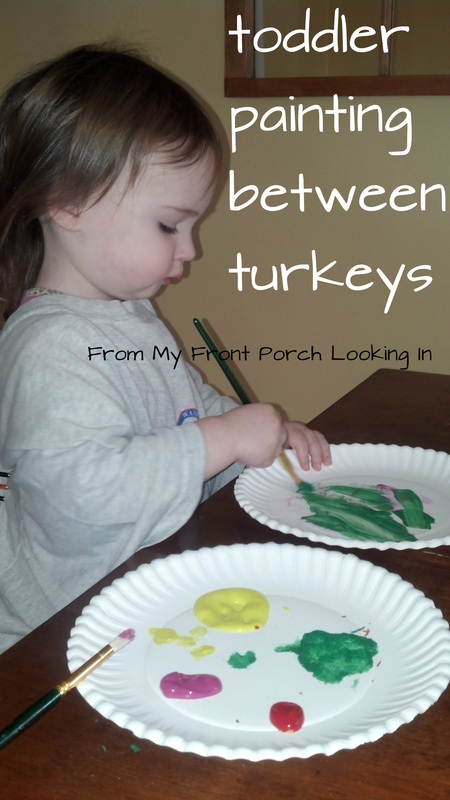
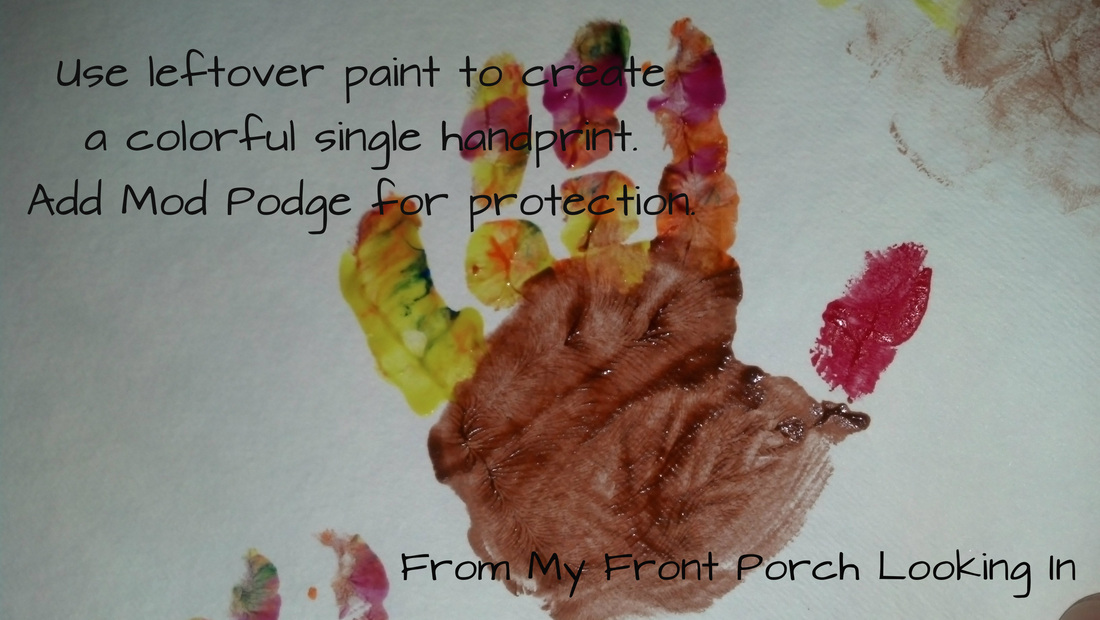
In between turkeys and while the paint dried, Alice got to have some free time to paint whatever she wanted. Then we made a mini turkey with all of the colors. You can see it below. I loved the turkeys made with her feet, but the single hand turkey is probably my favorite because it feels like a better visual of how tiny her hands still are.
Once the paint dried, I drew a cute little face on the turkey and glued all of the pieces together. On the back, I put Alice's name and the date. Then when the glue was dry, I Mod Podged both sides of the turkey for protection. I used glossy Mod Podge...next year I think I will use matte.
Alice loved this so much that now every time we paint, she wants to paint with her hands and feet! I hope your little one enjoys this fun craft, too!
The first thing we did was pick our colors. I had selected traditional Thanksgiving/Fall Harvest colors. Alice added the purple. I think the contrast is nice together. Who would have thought that a two year old could open my eyes to a different design option?!?! Anyway, once our colors were selected, we put some on paper plates. As you skim through various painting blogs, you will notice we paint A LOT on paper plates. Plates do not bleed through like paper does...even the "artist" paper bleeds horribly when a child is finger painting. For the actual turkeys, I did use paper because the amount of paint was controlled.
The first step was to paint Alice's hands each of the beautiful colors. Of course, we had to make 4 or 5 different sets for all of the grandparents. Alice really got a kick out of this because it tickled! Every time the brush came into contact with her fingers, she would giggle!
Once all of the hands were done, we took off the socks and got down to the business of painting feet! Well, that really got Alice going! She was laughing so hard my husband had to help me so she didn't get brown paint all over the place. We painted both feet which meant that half of the turkey bodies were lefties and half were righties.
In between turkeys and while the paint dried, Alice got to have some free time to paint whatever she wanted. Then we made a mini turkey with all of the colors. You can see it below. I loved the turkeys made with her feet, but the single hand turkey is probably my favorite because it feels like a better visual of how tiny her hands still are.
Once the paint dried, I drew a cute little face on the turkey and glued all of the pieces together. On the back, I put Alice's name and the date. Then when the glue was dry, I Mod Podged both sides of the turkey for protection. I used glossy Mod Podge...next year I think I will use matte.
Alice loved this so much that now every time we paint, she wants to paint with her hands and feet! I hope your little one enjoys this fun craft, too!
 RSS Feed